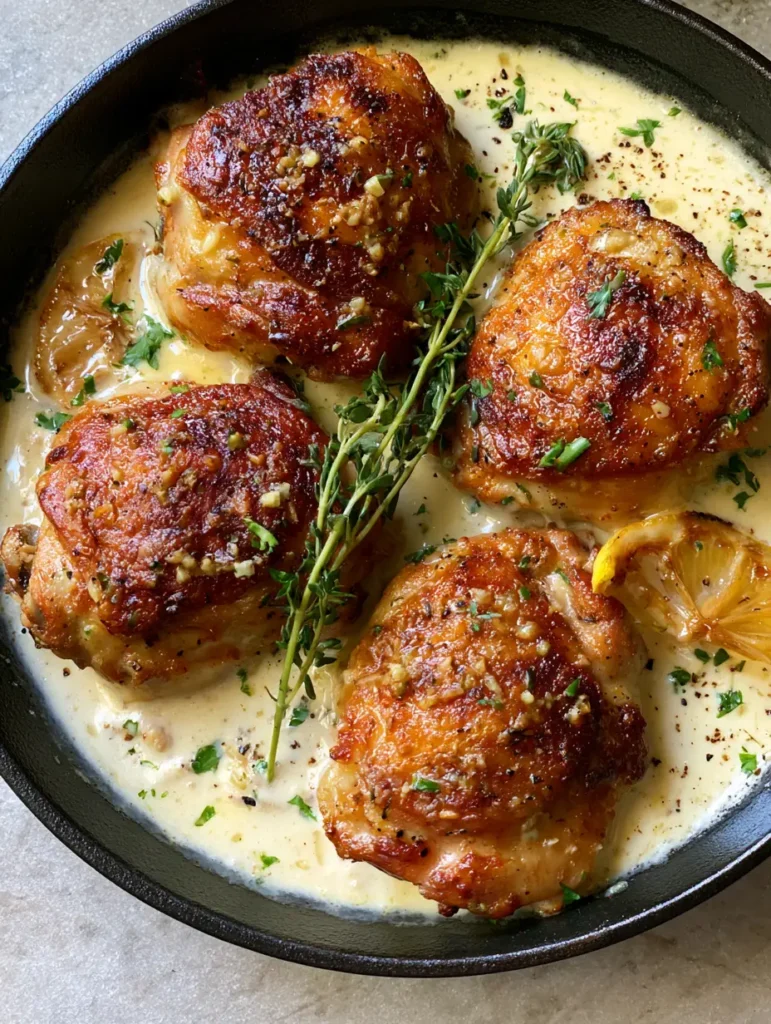
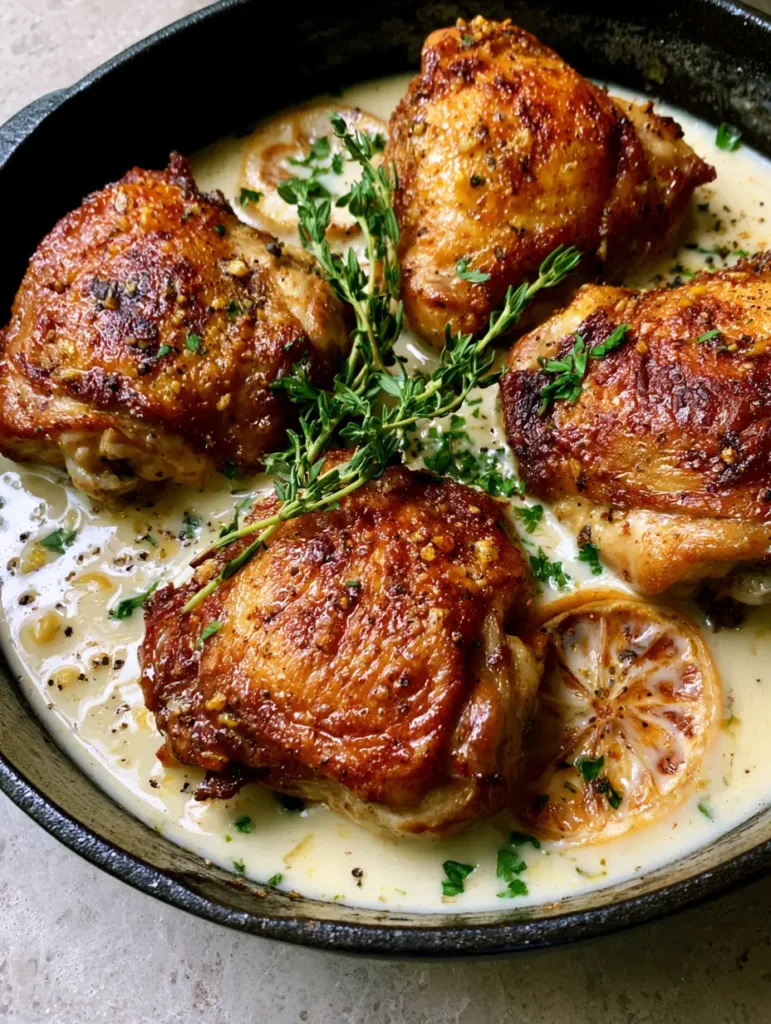
There is a specific kind of magic that happens in a black cast iron skillet when cold poultry hits hot rendered fat. These Creamy Garlic Chicken Thighs are the embodiment of that culinary alchemy, featuring skin seared to a deep, shatteringly crisp golden-brown and nestled in a sauce so glossy it looks like liquid silk.
When you look at this dish, your eyes are immediately drawn to the high-contrast textures. The rugged, cracked black pepper and the delicate, needle-like leaves of fresh thyme sprigs stand out against the off-white, velvet-smooth garlic cream.
This isn’t just a meal; it is a masterclass in building layers of flavor in a single pan. From the bright, acidic pop of caramelized lemon slices to the pungent, mellow sweetness of slow-cooked minced garlic, every element is designed to keep you coming back for “just one more” spoonful of sauce.
Why These Crispy Chicken Thighs Will Become Your New Obsession
- The Ultimate Texture Play: You get the crunch of high-heat seared skin paired with a rich, emulsified garlic cream that coats the back of a spoon perfectly.
- One-Pan Simplicity: By utilizing the fond (those flavorful brown bits) left behind by the chicken, we build a restaurant-quality sauce without needing extra pots.
- Visually Stunning Presentation: The vibrant green of chopped parsley and the charred edges of lemon slices make this a centerpiece-worthy dinner for guests or a luxury weeknight treat.
- Keto-Friendly and High Protein: This recipe delivers maximum indulgence with very few carbohydrates, making it a staple for those following a low-carb lifestyle.
The Anatomy of a Perfect One-Pan Chicken Dinner
Before we fire up the stove, let’s look at the “Foundational Four” elements that make these Creamy Garlic Chicken Thighs work. Understanding the why behind the ingredients helps you cook with intuition rather than just following a list.
Bone-In, Skin-On Chicken Thighs: 2 lbs (907g). The bone acts as an insulator, keeping the meat juicy during the high-heat sear, while the skin provides the essential rendering fat for the sauce.
Fresh Heavy Cream: 1 cup (240ml). This is the base of our “glossy off-white” sauce; the high fat content prevents curdling when we eventually add the acidic lemon juice.
Fresh Garlic Cloves: 6-8 cloves (approx. 30g). We use a combination of finely minced garlic for the sauce and slightly larger bits to create that “speckled” visual texture seen in the skillet.
Whole Thyme Sprigs and Parsley: 4 sprigs of thyme and 2 tbsp (8g) of parsley. Fresh herbs are non-negotiable here; the oils in fresh thyme release a woody aroma that dried herbs simply cannot replicate.
Lemon Slices: 1 small lemon, thinly sliced. Caramelizing the lemons in the chicken fat removes the harsh bite and transforms them into sweet-tart garnishes that cut through the richness of the cream.
Cracked Black Pepper and Kosher Salt: To taste. We use a coarse grind for the pepper to ensure those visible dark flecks pop against the pale sauce.
Essential Tools for the Perfect Sear
To achieve the specific visual result of “deep golden-brown crispy texture,” your choice of equipment is vital. A standard non-stick pan will not produce the same level of caramelization or the “fond” necessary for a deep, savory sauce.
12-inch Cast Iron Skillet: The heavy thermal mass of cast iron ensures the temperature doesn’t drop when you add the chicken, resulting in a superior crust. It also transitions beautifully from stovetop to table.
Fine-Mesh Sieve or Garlic Press: For the minced garlic, you want consistent sizing so the garlic “melts” into the sauce without burning during the brief sauté phase.
Stainless Steel Tongs: Essential for pressing the chicken skin firmly against the hot metal to ensure even contact and browning.
Step-by-Step: Mastering the Golden Sear and Velvet Sauce
Phase 1: Preparing the Protein and Pan
Pat the chicken thighs bone-in skin-on very dry with paper towels. Any moisture on the surface will create steam, which is the enemy of a “shatteringly crisp” skin.
Season generously with kosher salt and cracked black pepper on both sides. Allow the chicken to sit at room temperature for 15 minutes to ensure even cooking through to the bone.
Phase 2: The Art of the Maillard Reaction
Heat 1 tbsp (15ml) of high-smoke point oil in your cast iron skillet over medium-high heat. Once the oil is shimmering and just beginning to wisps of smoke, place the chicken thighs skin-side down.
Press down lightly with your tongs and then do not move them for at least 6-8 minutes. You are looking for a “deep golden-brown” visual cue. If the skin resists when you try to lift it, it’s not ready yet; it will release naturally once the crust is fully formed.
Phase 3: Caramelizing the Aromatics
Flip the chicken and cook for another 5 minutes on the flesh side, then remove to a plate. In the remaining fat, drop in your thin lemon slices.
Sear the lemons for 1-2 minutes per side until the edges are charred and the centers are translucent. Remove them and set aside with the chicken.
Phase 4: Building the Glossy Garlic Infusion
Lower the heat to medium. Add the minced garlic and fresh thyme sprigs to the pan, stirring constantly for 60 seconds. You will smell the garlic become fragrant and see it turn a pale straw color—do not let it turn dark brown or it will become bitter.
Pour in 1/2 cup (120ml) of chicken stock to deglaze the pan, scraping up all the brown bits with a wooden spoon. This is where the deep flavor of the Creamy Garlic Chicken Thighs is born.
Phase 5: The Final Emulsion
Whisk in the heavy cream and bring to a gentle simmer. The sauce will begin to thicken and take on a “glossy, off-white” appearance. Add the chicken back into the skillet, keeping the crispy skin above the sauce line to maintain its texture.
Tuck the caramelized lemon slices back into the sauce and simmer for 3-5 minutes until the chicken reaches an internal temperature of 165°F (74°C).
Expert Tips for Success
- The Skin-Up Rule: Never pour the sauce over the top of the chicken once it’s seared. To keep the skin crispy, the liquid should only reach halfway up the sides of the thighs.
- Don’t Crowd the Pan: If you use more than four thighs, sear them in batches. Overcrowding leads to steaming, resulting in grey, rubbery skin instead of golden-brown perfection.
- Tempering the Cream: If you are worried about the sauce breaking, let the cream sit on the counter for 10 minutes before adding it to the hot pan to reduce the temperature shock.
- The Resting Period: Let the dish sit for 5 minutes before serving. This allows the sauce to finish thickening into that “glossy” state described in our visual blueprint.
What to Serve With This Decadent Chicken
Because the garlic cream is so rich, you want side dishes that can either soak up the sauce or provide a fresh contrast. If you’re looking for a full comfort meal, this chicken pairs beautifully with one-pot pasta dishes that can handle a creamy companion.
For a lighter option, serve the thighs over a homemade protein flatbread to mop up every drop of the garlic infusion. If you enjoy the flavor profile of this sauce, you will likely love our creamy garlic pork chops, which use a similar emulsification technique.
If you have leftovers (though you likely won’t!), the chicken meat can be shredded and used as a filling for flavorful chicken wraps or even topped onto a fajita-style bowl for a fusion lunch the next day.
Storage, Reheating, and Freezing Advice
To Store: Keep leftovers in an airtight container in the refrigerator for up to 3 days. The sauce will thicken significantly as it cools.
To Reheat: The best way to preserve the skin’s texture is in a 350°F (175°C) oven or air fryer. If using a microwave, the skin will soften, but the flavor will remain excellent. Add a splash of milk or water to the sauce to loosen it during reheating.
To Freeze: We do not recommend freezing this specific dish, as heavy cream-based sauces tend to separate and become “grainy” when thawed and reheated.
Frequently Asked Questions
Milk is much thinner and more prone to curdling. If you must substitute, use half-and-half or full-fat coconut milk, but the sauce will not be as thick or glossy as the heavy cream version.
Yes, but you will need to reduce the cook time as boneless thighs cook faster. Keep in mind that bone-in thighs generally provide more flavor and remain juicier under high heat.
Garlic burns quickly once the moisture is evaporated. Ensure you lower the heat to medium and have your chicken stock ready to deglaze the pan immediately after the garlic becomes fragrant (about 60 seconds).
A sauce usually separates if it boils too vigorously or if too much acid is added too quickly. Whisk in a tablespoon of warm heavy cream or a splash of chicken stock over low heat to help re-emulsify the sauce.
To maintain crispness, do not submerge the skin. The sauce should only reach halfway up the chicken. Additionally, do not cover the pan with a lid, as the trapped steam will soften the skin.
The Ultimate Creamy Garlic Chicken Thighs Recipe
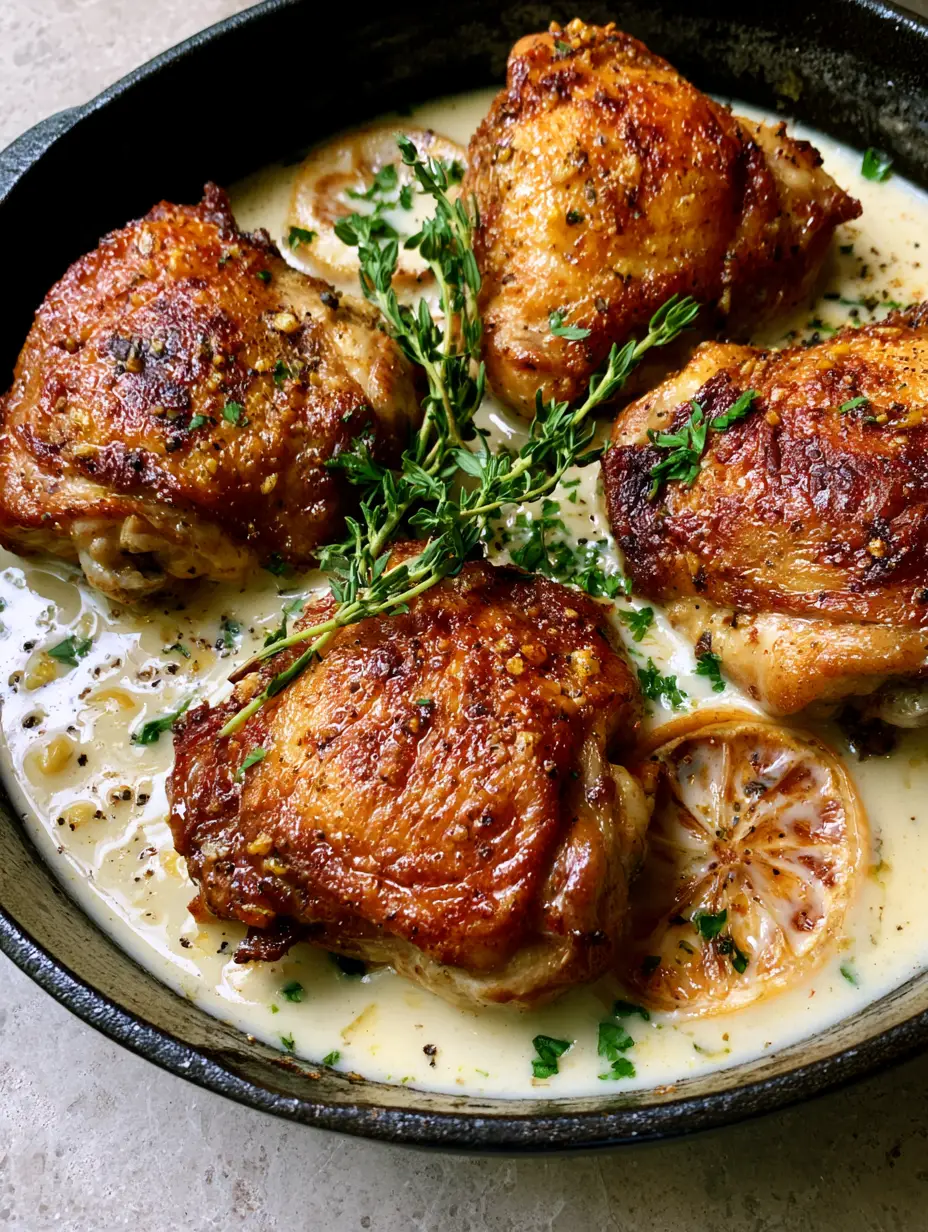
Creamy Garlic Chicken Thighs with Crispy Skin and Caramelized Lemon
Ingredients
Equipment
Instructions
- Pat chicken thighs extremely dry and season with salt and cracked black pepper.
- In a cast iron skillet over medium-high heat, sear chicken skin-side down for 8-10 minutes until deep golden-brown and crispy. Flip and cook for 5 more minutes, then remove.
- Sear lemon slices in the chicken fat for 1 minute per side until charred; remove.
- Add minced garlic and thyme sprigs to the pan. Sauté for 1 minute until fragrant.
- Deglaze with chicken stock, then whisk in heavy cream. Bring to a simmer until glossy and slightly thickened.
- Return chicken and lemons to the pan. Simmer for 5 minutes. Garnish with chopped parsley.
Notes
Keep the crispy skin above the sauce line to maintain its crunch.

Elevate Your Dinner Rotation Tonight
Mastering the balance of a high-heat sear and a delicate cream sauce is the hallmark of an advanced home cook. These Creamy Garlic Chicken Thighs provide that “wow” factor with minimal effort and common pantry staples. The combination of woody thyme, bright lemon, and deep garlic notes creates a profile that is both sophisticated and incredibly comforting.
If you made this recipe and loved the “deep golden-brown” results, please leave a comment below and let us know! Don’t forget to share your photos on Pinterest so we can see your culinary masterpieces.