There is a specific, intoxicating aroma that fills a kitchen when butter begins to transform. It starts with a sizzle, transitions into a gentle foam, and finally settles into a deep, nutty perfume that signals the birth of liquid gold. These Brown Butter Chocolate Chip Cookies aren’t just a dessert; they are a masterclass in culinary chemistry and sensory indulgence.
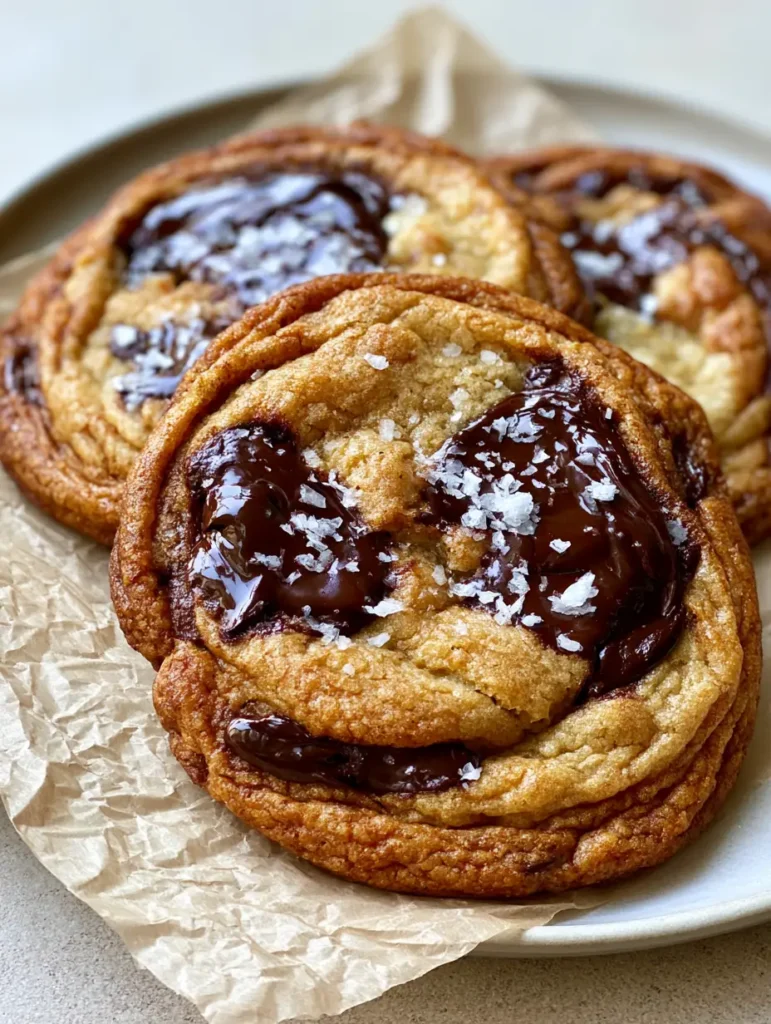
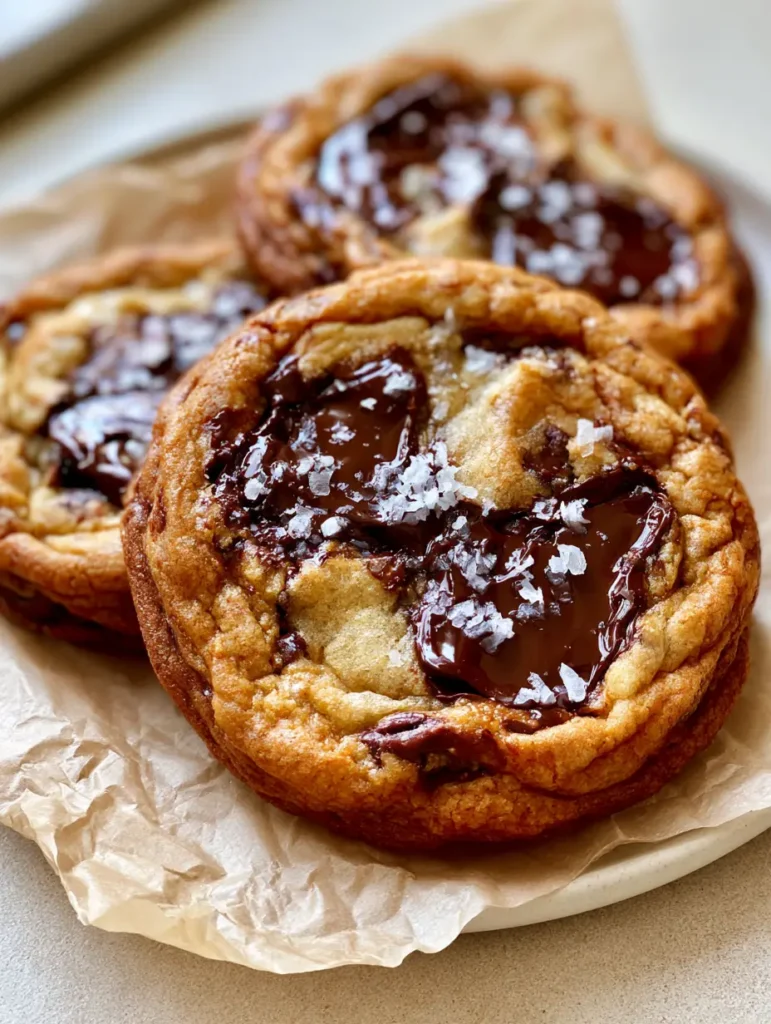
Imagine biting into a cookie where the edges are deeply caramelized and rippled, offering a crisp snap that immediately gives way to a soft, pale-gold center. The contrast is heightened by massive, glistening pools of melted dark chocolate and a delicate crunch of coarse white flaky sea salt. This recipe is designed to replicate that exact professional, handheld smartphone aesthetic—thick, crinkled, and utterly buttery.
By browning the butter, we unlock a depth of flavor that standard cookies simply cannot reach. The toasted milk solids infuse the dough with notes of butterscotch and toasted hazelnuts, creating a sophisticated base for the bittersweet chocolate. Whether you are a seasoned baker or a curious novice, this guide will walk you through the science of the perfect ripple and the secret to those iconic chocolate puddles.
Why These Toasted Golden-Brown Masterpieces Stand Out
- The Maillard Reaction: By browning the butter and using a high ratio of brown sugar, we maximize caramelization for those signature “rippled” edges.
- Texture Contrast: The combination of a high-heat start and specific flour ratios ensures a “soft chewy center” while the exterior remains crisp.
- Visual Glisten: We use chopped dark chocolate bars instead of chips to create those wide, “glistening pools of melted dark chocolate” seen in elite food photography.
- Balanced Finish: A precise “delicate sprinkle of coarse white flaky sea salt” cuts through the richness, elevating the cocoa notes and the nuttiness of the butter.
The Anatomy of an Elite Cookie Ingredient List
Unsalted Butter: 1 cup (227g). We start with high-quality unsalted butter to control the sodium levels while we cook it down into a rich, amber-colored liquid. The browning process removes water and toasts the milk solids, providing the foundational “toasted golden-brown” flavor profile.
Dark Chocolate Bars (70% Cacao): 9 oz (255g). Instead of standard chips, which contain stabilizers to hold their shape, we use chopped bars. This is the secret to achieving those “large, glistening pools” that drape over the crinkled edges of the cookie.
Dark Brown Sugar: 1 cup (200g), packed. The high molasses content in dark brown sugar is responsible for the “chewy” texture and the deep caramel notes. It reacts with the baking soda to create a lift that eventually collapses into those beautiful ripples.
Granulated White Sugar: 1/2 cup (100g). White sugar is essential for the “caramelized edges.” It provides the crispness that balances the soft, pale-gold centers, ensuring the cookie doesn’t feel like a piece of cake.
All-Purpose Flour: 2 1/4 cups (280g). This provides the necessary structure. It’s the “invisible ingredient” that holds the weight of the heavy chocolate pools without letting the cookie spread into a flat pancake.
Large Eggs + One Yolk: 2 total. Using one full egg and one additional yolk adds extra lecithin and fat. This results in a “buttery” and “thick” dough that remains tender even after the edges have crisped up.
Vanilla Bean Paste or Extract: 1 tbsp (15ml). Vanilla acts as a flavor enhancer for the chocolate. If you’ve ever enjoyed a Russian buttercream frosting, you know how high-quality vanilla can transform simple fats into something gourmet.
Baking Soda: 1 tsp (5g). This leavening agent encourages browning. It reacts with the acidic brown sugar to create carbon dioxide, which gives the cookie its initial rise before it settles into its “crinkled” state.
Fine Sea Salt: 1/2 tsp (3g). Inside the dough, this balances the sugars. Outside, we will use the “coarse white flaky sea salt” for the visual and textural finish.
Essential Tools for Achieving Professional Ripples
To achieve the “thick, chewy” result seen on the “crumpled parchment paper” in our visual prompt, you need the right gear. A heavy-bottomed stainless steel saucepan is non-negotiable for browning butter, as it allows you to see the color change of the milk solids clearly.
You will also need a mechanical cookie scoop (approximately 3 tablespoons in size) to ensure uniform baking. Using a light-colored aluminum baking sheet prevents the bottoms from burning before the centers are set. Finally, a wire cooling rack is vital to stop the cooking process and preserve those “soft, pale-gold centers.”
Mastering the Art of the Maillard Reaction: Step-by-Step
1. Creating the Liquid Gold (Browned Butter)
In a medium stainless steel saucepan, melt the 1 cup (227g) of butter over medium heat. Once melted, the butter will begin to foam and pop—this is the water evaporating. Stand over the pan and whisk constantly as the foam subsides and you see little brown specks forming at the bottom.
As soon as the butter smells nutty and looks like the color of a penny, remove it from the heat. Immediately pour it into a heat-proof bowl, scraping every last toasted bit out. Much like the technique used for a chocolate mousse cake filling, temperature control here is everything; let it cool for 15 minutes before proceeding.
2. Creaming for Texture and Structure
Combine the cooled brown butter with the dark brown sugar and white sugar. Use a whisk or stand mixer to beat them together for about 2 minutes. You aren’t just mixing; you are dissolving the sugar crystals into the fat to create that “crinkled and buttery” surface texture.
Add the egg, the extra yolk, and the vanilla paste. Beat on medium-high for another 3 minutes until the mixture lightens in color and becomes thick and ribbony. This aeration is what ensures the centers remain “pale-gold” and airy rather than dense and oily.
3. Folding in the Dark Chocolate Feves
Sift the flour, baking soda, and fine salt into the wet ingredients. Use a spatula to fold the dough by hand until just a few streaks of flour remain. Over-mixing at this stage will develop gluten, turning your “chewy” cookie into a tough one.
Fold in 7 oz of the chopped dark chocolate. Save the remaining 2 oz for the “topping” stage. The dough should look rich and “toasted golden-brown” even before it hits the oven. If you enjoy the nutty profile here, you might also find the delicate crunch of French almond cookies particularly appealing.
4. The Chill and the Bake
For the best flavor, chill the dough for at least 30 minutes (or up to 24 hours). When ready to bake, preheat your oven to 350°F (175°C). Scoop large mounds of dough onto a tray lined with “crumpled parchment paper.”
Place the reserved chunks of chocolate directly on top of each dough ball. Bake for 10-12 minutes. For those “deeply golden-brown, rippled edges,” try the “pan-banging” trick: halfway through baking, lift the tray and gently drop it against the oven rack. This causes the edges to collapse and ripple beautifully.
5. The Finishing Touch
Remove the cookies when the edges are set and dark but the centers still look slightly underdone. While the chocolate is still “glistening” and molten, take your “coarse white flaky sea salt” and give each cookie a “delicate sprinkle.” Let them cool on the pan for 10 minutes to finish setting into that “thick, chewy” perfection.
Expert Tips for Success
- Don’t Fear the Foam: When browning butter, the foam can make it hard to see the bottom. Keep whisking and use your nose—the nutty aroma is the best indicator of readiness.
- The “Scoop and Squish”: If your cookies aren’t rippling enough, use a round cutter or glass to “scoot” the cookies into a perfect circle immediately after they come out of the oven.
- Quality of Chocolate: Avoid “semi-sweet” chips if you want the visual result of the blueprint. Use a high-quality bar with at least 60-70% cacao for those “molten dark chocolate pools.”
- Room Temperature Eggs: Cold eggs will seize the warm brown butter. Ensure your eggs are at room temperature to maintain a smooth, emulsified dough.
Storage, Reheating & Freezing Your Cookies
These cookies are at their peak of “soft chewy centers” about 30 minutes after baking. To store, place them in an airtight container at room temperature for up to 4 days. Including a small piece of white bread in the container will help keep them soft by regulating moisture.
To freeze, scoop the dough into balls and freeze on a tray before transferring to a bag. You can bake them directly from frozen; just add 2 minutes to the bake time. If you love the convenience of frozen treats, check out our guide on how to store a Dubai chocolate pistachio cake for later enjoyment.
What to Pair with Salty, Buttery Cookies
These cookies are incredibly rich, making them the perfect partner for a cold glass of milk or a sharp espresso. If you are planning a full dessert spread, they contrast beautifully with the creamy texture of Oreo cheesecake cookie cups. For those who prefer a savory-to-sweet transition, these cookies are a fantastic follow-up to a hearty meal like our crispy Cajun chicken sandwich.
Frequently Asked Questions
While you can, chilling the dough for at least 30 minutes allows the flour to hydrate and the brown butter flavor to intensify, resulting in a better rise.
Use the ‘pan-banging’ method: gently drop the baking sheet against the oven rack a few times during the final minutes of baking to collapse the dough.
Using high-quality chopped dark chocolate bars instead of chips is key. Bars lack the stabilizers found in chips, allowing the chocolate to spread into molten puddles.
Browning the butter removes water and toasts the milk solids, creating a deep, nutty flavor and a chewier texture that standard butter cannot provide.
This usually indicates over-baking. Remove the cookies when the edges are deeply browned but the centers still look slightly soft and underdone; they will finish setting on the pan.
The Ultimate Brown Butter Chocolate Chip Cookies Recipe
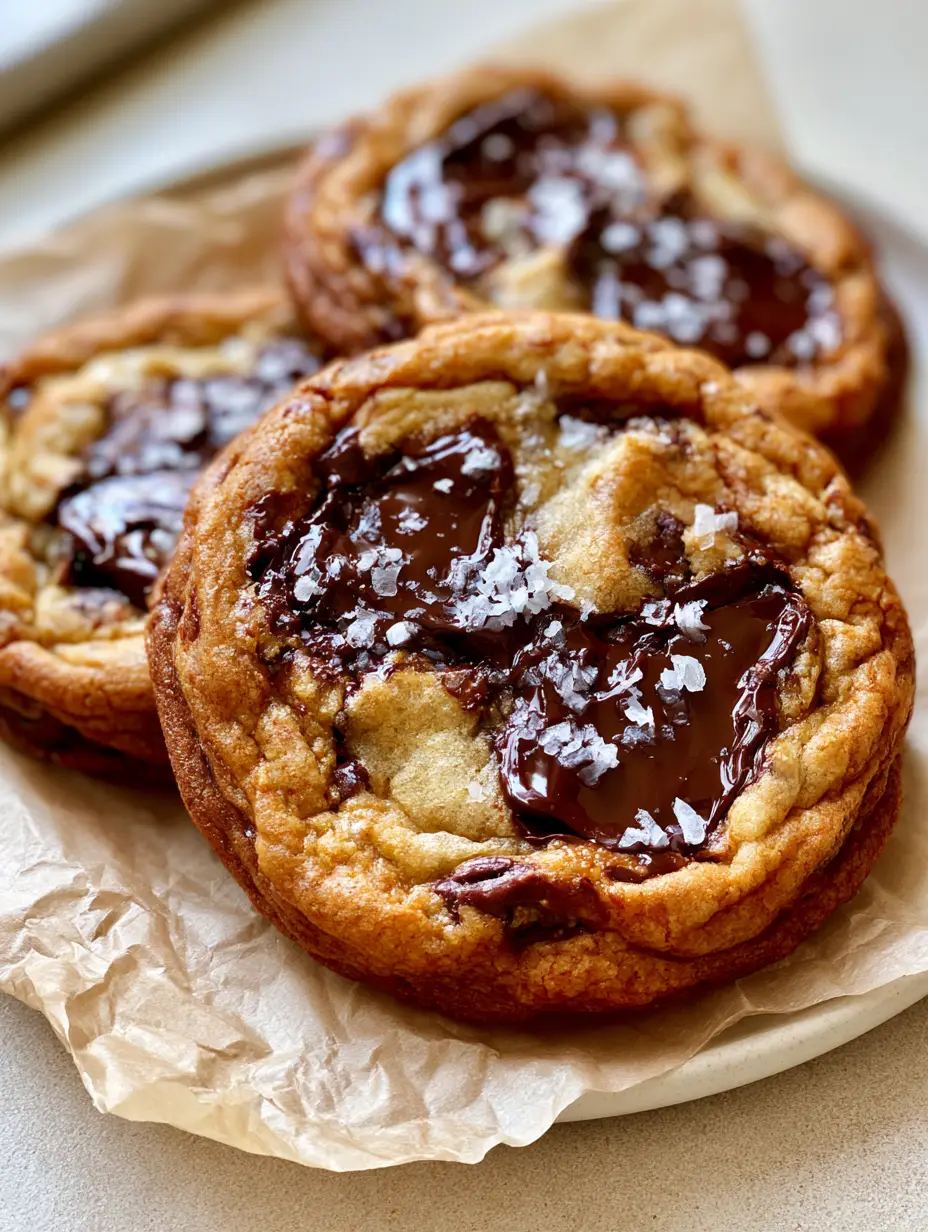
Brown Butter Chocolate Chip Cookies: The Ultimate Guide to Toasted Edges and Molten Dark Chocolate Pools
Ingredients
Equipment
Instructions
- Melt butter in a saucepan over medium heat. Whisk until it foams, pops, and develops brown bits with a nutty aroma. Pour into a bowl to cool.
- Whisk cooled brown butter with brown and white sugars for 2 minutes. Add egg, yolk, and vanilla; beat for 3 minutes until pale and ribbony.
- Fold in sifted flour, baking soda, and fine salt until just combined. Fold in 7oz of chopped dark chocolate.
- Scoop dough onto parchment paper. Top with remaining chocolate chunks. Bake at 350°F for 10-12 minutes, using the pan-banging method for ripples.
- Immediately sprinkle with flaky sea salt while chocolate pools are glistening. Cool on pan for 10 minutes.
Notes
Don't skip the extra egg yolk for maximum chewiness.

Closing & Call to Action
There is nothing quite like the satisfaction of pulling a tray of Brown Butter Chocolate Chip Cookies out of the oven and seeing those glistening pools of chocolate reflecting the light. This recipe bridges the gap between home baking and professional pastry arts, giving you a result that is as visually stunning as it is delicious.
If you made these, I would love to see your “rippled edges” and “caramelized” results! Leave a comment below and tell me—did the pan-banging trick work for you? Don’t forget to follow me on Pinterest for more visually inspired recipes and kitchen tips. Happy baking!