When it comes to weeknight dinners that feel like a high-end bistro meal, nothing competes with this Creamy Baked Ricotta Chicken. This dish is a masterclass in textural contrasts, combining the deep, savory crunch of a cast iron sear with the cloud-like softness of whipped ricotta and a decadent blanket of bubbling mozzarella. Every bite is a balance of juicy poultry and the salty, charred notes of toasted parmesan.
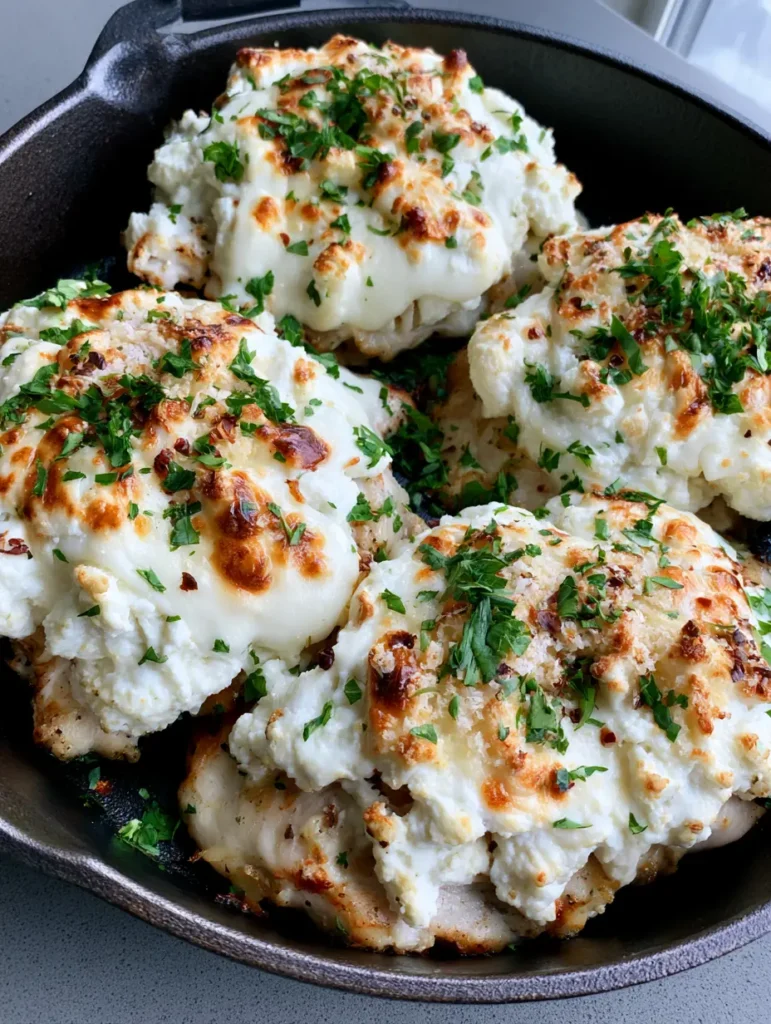
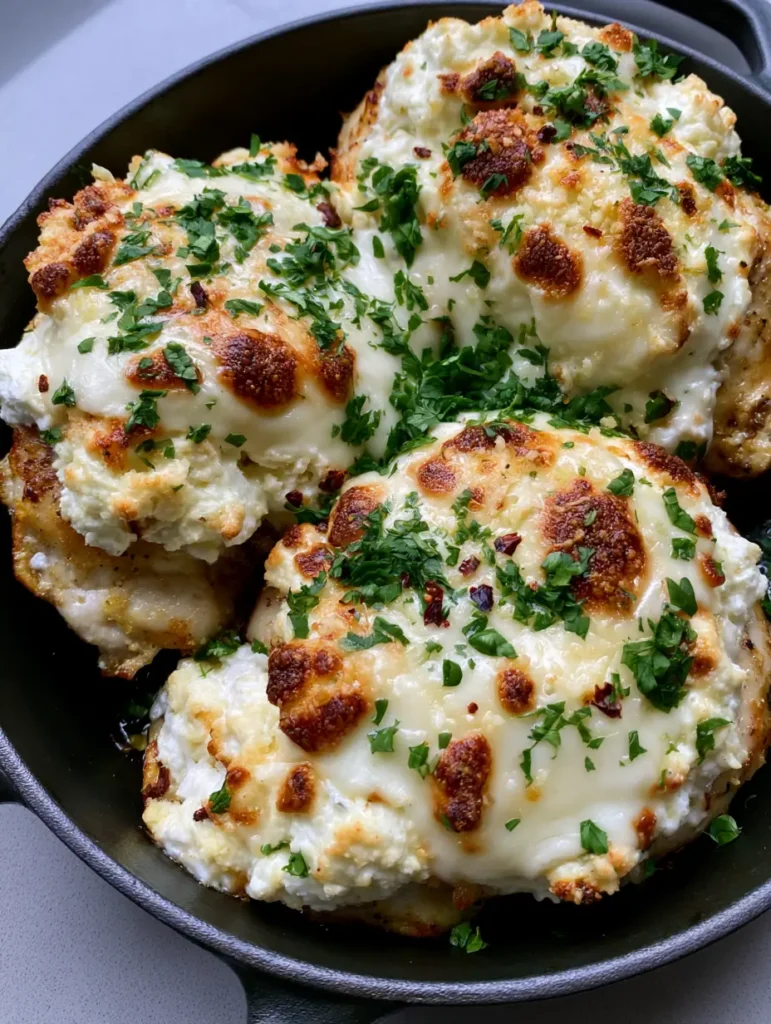
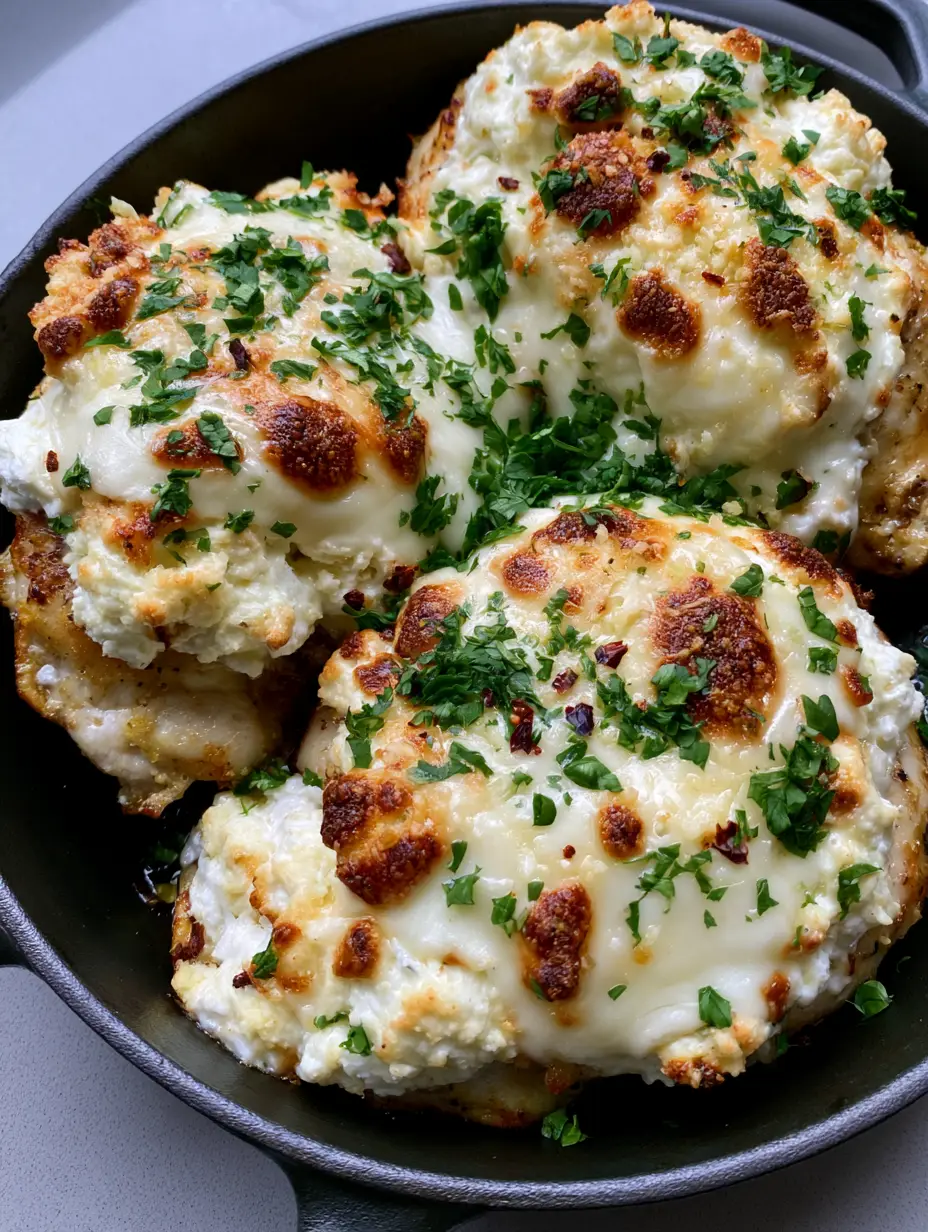
The beauty of this recipe lies in its simplicity and its visual drama. Inspired by authentic, handheld kitchen photography, the final result features thick, golden-brown chicken breasts topped with mounds of cheese that look just as good as they taste. Whether you are a seasoned home cook or just looking for a new way to elevate chicken breast, this method ensures your protein remains moist while the cheese topping achieves those coveted “burnt sugar” colored spots.
If you enjoy hearty, cheese-forward proteins, you might also find yourself craving our garlic parmesan chicken meatloaf or perhaps a lighter evening with crispy oven-baked chicken drumsticks. But today, we are focusing on the creamy, molten perfection of the ricotta skillet.
Why This Skillet Ricotta Chicken Is a Game Changer
- Unmatched Texture: We use a dual-cooking method—searing first for a golden crust, then baking for a tender interior.
- The Ricotta “Mound”: Unlike thin sauces, this recipe features a thick, textured layer of ricotta that holds its shape under the broiler.
- Visual Appeal: The combination of vibrant green parsley and fiery red pepper flakes against the toasted white cheese creates a stunning presentation.
- One-Pan Simplicity: Using a dark cast iron skillet means less cleanup and better heat retention for that perfect cheese char.
Essential Elements for the Perfect Ricotta Topping
To achieve the result seen in our visual blueprint, you cannot just throw cheese on chicken. You need the right foundational ingredients to ensure the topping stays thick and flavorful rather than melting away into a puddle.
Boneless Skinless Chicken Breasts: We use four large breasts (approx. 6 oz / 170g each). Their flat surface acts as the perfect canvas for the heavy cheese layers.
Whole Milk Ricotta Cheese: 1 cup (250g) of full-fat ricotta is essential. Low-fat versions contain too much moisture and will weep, ruining the sear on your chicken.
Low-Moisture Mozzarella: 1 cup (115g) of shredded mozzarella provides that iconic cheese pull. Avoid fresh mozzarella packed in water for this specific recipe as it is too wet.
Grated Parmesan Cheese: 1/2 cup (45g) of parmesan provides the saltiness and the ability to toast into those beautiful brown charred spots.
Large Egg: One lightly beaten egg acts as a binder. This is the “invisible science” ingredient that keeps the ricotta mound from sliding off the chicken during the bake.
Garlic and Seasonings: 2 cloves of minced garlic, 1 tsp (6g) of kosher salt, and 1/2 tsp (1g) of cracked black pepper provide the flavor base for the meat and the cheese.
Fresh Herbs and Spice: 2 tbsp (8g) of finely chopped fresh parsley and 1/2 tsp (1g) of dried red pepper flakes are added at the very end to provide a pop of color and a subtle heat.
The Science of the Cast Iron Sear
Why a cast iron skillet? To get the Creamy Baked Ricotta Chicken to look like the professional visual prompt, you need a pan that can handle high heat and transition seamlessly from stovetop to oven. Cast iron has high thermal mass, meaning it won’t drop in temperature when you add the cold chicken breasts.
This heat retention is what creates the “Golden-Brown Finish” mentioned in our blueprint. When the chicken hits the hot oil, the Maillard reaction occurs, creating complex flavors and a crust that prevents the meat from drying out while it bakes under the cheese.
If you are looking for more skillet-based inspiration, our one-pot steak and pasta also utilizes high-heat searing to lock in flavor before finishing the dish. Mastery of the skillet is the secret to elite home cooking.
Step-by-Step Guide to Achieving the Perfect Char
Preparing the Protein Base
Start by patting your chicken breasts completely dry with paper towels. Any moisture on the surface will create steam, preventing that deep golden crust. Season both sides generously with salt and pepper.
Heat 2 tbsp (30ml) of extra virgin olive oil in your cast iron skillet over medium-high heat. You will know it’s ready when the oil shimmers and a tiny drop of water sizzles instantly upon contact.
Executing the Professional Sear
Place the chicken breasts in the skillet. Listen for that loud, aggressive sizzle—that is the sound of flavor developing. Sear for 3-4 minutes without moving them.
Flip the chicken once they release easily from the pan. The underside should be a vibrant, even golden brown. Sear the other side for just 2 minutes; we will finish the cooking process in the oven.
Building the Cheese Layers
In a medium bowl, whisk the egg, then fold in the ricotta, minced garlic, and half of the parmesan. This creates a thick, spreadable paste. Dollop a generous “mound” of this mixture onto each seared chicken breast.
Top each mound with a thick blanket of shredded mozzarella and the remaining parmesan. The goal is to completely obscure the chicken so the cheese protects the meat from the oven’s direct heat.
The Final Bake and Broil
Transfer the skillet to a preheated oven at 400°F (200°C). Bake for 12-15 minutes until the chicken reaches an internal temperature of 160°F (71°C).
Switch your oven to the “Broil” setting for the last 2-3 minutes. Watch closely! You are looking for those “distinct golden-brown charred spots” to appear on the mozzarella. This is the visual cue for peak flavor.
Expert Tips for Culinary Success
- Temperature Control: Always use a meat thermometer. Chicken is safely cooked at 165°F (74°C), but pulling it at 160°F and letting it rest will keep it much juicier.
- The Ricotta Texture: If your ricotta seems particularly watery, strain it through cheesecloth for 10 minutes before mixing. This ensures the “mound” remains thick and textured.
- Room Temp Meat: Let your chicken sit on the counter for 15 minutes before searing. Cold meat can cause the skillet temperature to plummet, leading to gray, boiled-looking chicken.
- Freshness Matters: Chop your parsley right before serving. The volatile oils in fresh parsley provide a fragrance that dried parsley simply cannot replicate.
What to Serve With This Skillet Masterpiece
This Creamy Baked Ricotta Chicken is incredibly rich, so it pairs best with sides that offer a bit of acidity or crunch. A simple arugula salad with lemon vinaigrette cut through the fat of the cheese perfectly.
If you want a more indulgent meal, serve it alongside our iconic popovers for dipping into the excess melted cheese. For a high-protein feast, a side of savory black beans and rice (coming soon) provides a great textural contrast to the soft ricotta.
Storage, Reheating & Freezing
Storage: Keep leftovers in an airtight container in the refrigerator for up to 3 days. The cheese will firm up, but the flavors will continue to meld.
Reheating: For the best results, avoid the microwave, which can make the chicken rubbery. Instead, place the chicken in a baking dish, cover with foil, and warm at 350°F (175°C) until the cheese is melted again.
Freezing: While you can freeze this dish, the texture of the ricotta may change slightly upon thawing, becoming more granular. If you do freeze, wrap tightly in plastic wrap and then foil for up to 2 months.
Frequently Asked Questions
Yes, you can sear the chicken in a regular frying pan and then transfer it to a greased baking dish to finish in the oven, though you may lose some of the crust’s texture.
Yes, boneless skinless thighs work beautifully. Just note that they may require an additional 5 minutes of baking time due to their higher fat content.
Use whole milk ricotta and strain it through a fine-mesh sieve or cheesecloth for 10 minutes before using. Adding an egg to the mixture also helps bind the moisture.
Absolutely! This recipe is naturally low-carb and high-protein, making it perfect for a ketogenic diet as long as you don’t serve it with high-carb sides.
The secret is the final broil. After baking, switch the oven to high broil for 2-3 minutes. The sugars in the mozzarella and parmesan will caramelize into those delicious dark spots.
The Complete Creamy Baked Ricotta Chicken Recipe
Creamy Baked Ricotta Chicken: The Ultimate Skillet Dinner Recipe
Ingredients
Equipment
Instructions
- Pat chicken breasts dry with paper towels and season both sides with salt and pepper.
- Heat olive oil in a cast iron skillet over medium-high heat. Sear chicken for 3-4 minutes per side until a deep golden-brown crust forms.
- In a bowl, combine ricotta, egg, minced garlic, and 1/4 cup (22g) of parmesan cheese.
- Spread a thick layer of the ricotta mixture over each chicken breast. Top with shredded mozzarella and the remaining parmesan.
- Place skillet in a preheated oven at 400°F (200°C) for 12-15 minutes.
- Switch to broil for 2-3 minutes until the cheese is bubbling and has charred golden-brown spots.
- Garnish with fresh parsley and red pepper flakes. Let rest for 5 minutes before serving directly from the skillet.
Notes
Pull the chicken from the oven when it hits 160°F as carry-over cooking will bring it to the safe 165°F during the rest.
Bring the Bistro to Your Kitchen
There is something deeply satisfying about pulling a sizzling cast iron skillet out of the oven, the cheese still bubbling and the aroma of garlic and toasted parmesan filling the air. This Creamy Baked Ricotta Chicken is more than just a meal; it is a sensory experience that proves chicken breast never has to be boring.
If you loved this recipe, please leave a comment below and let us know how your cheese char turned out! Don’t forget to follow us and save this recipe to your favorite boards on Pinterest for your next dinner party or family gathering.