Get ready to meet your new party showstopper. These Chili Cheese Dog Sliders are the ultimate crowd-pleaser, combining savory hot dogs, hearty chili, and gooey melted cheese, all nestled in soft, sweet Hawaiian rolls. This easy recipe is perfect for game day, family gatherings, or any time you need a fun and delicious meal that everyone will love. Forget complicated dishes; these pull-apart sliders are simple to assemble and disappear fast!
We’re taking all the classic flavors of a beloved ballpark favorite and transforming them into a shareable, oven-baked delight. A buttery topping seasoned with garlic and onion powder takes these sliders to the next level, creating a golden-brown finish that’s simply irresistible. Let’s dive into making the best chili cheese hot dog sliders you’ve ever had.
Why You’ll Love These Chili Cheese Dog Sliders
- Incredibly Easy: With simple ingredients and minimal prep, you can have these sliders assembled and ready for the oven in just about 10 minutes.
- Crowd-Pleasing Favorite: This recipe is a guaranteed hit with both kids and adults. It’s the perfect finger food for any casual get-together.
- Perfectly Shareable: The pull-apart format makes serving a breeze. Just place the tray on the table and let everyone grab their own.
- Customizable: Feel free to customize with your favorite chili, cheese, or even different types of hot dogs to make the recipe your own.
Ingredients You’ll Need
This recipe comes together with just a handful of simple, easy-to-find ingredients. Here’s what you’ll need:
- Hawaiian Rolls: A 12-pack of sweet Hawaiian rolls forms the perfect soft and slightly sweet base for our sliders.
- Hot Dogs: You’ll need 6 all-beef hot dogs, cut in half to fit perfectly on the small buns.
- Chili: One can of your favorite chili without beans is the quickest option. Feel free to use homemade chili if you have it!
- Cheddar Cheese: Shredded sharp cheddar cheese provides the best melt and a classic cheesy flavor.
- Butter: Salted butter is melted and brushed on top for a rich, golden-brown crust.
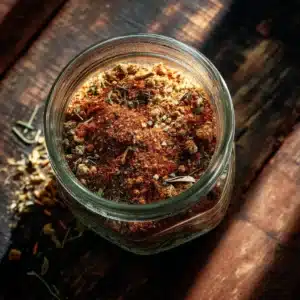
- Seasonings: A simple mix of garlic powder, onion powder, and Worcestershire sauce adds a savory depth of flavor to the butter topping.
- Optional Garnish: Finely diced red onion or fresh parsley adds a pop of color and freshness right before serving.
How to Make Chili Cheese Dog Sliders (Step-by-Step)
Follow these simple steps to create the ultimate game day sliders. It’s as easy as prep, assemble, and bake!
Step 1: Prep Your Buns and Dogs
First, preheat your oven to 375°F (190°C). Take your slab of Hawaiian rolls and, without separating them, slice them in half horizontally to create a top and bottom section. Place the bottom half in a 9×13 inch baking dish. Next, cook your hot dogs. You can boil, grill, or pan-fry them until they are heated through. Once cooked, slice each of the 6 hot dogs in half to create 12 smaller pieces.
Step 2: Assemble the Sliders
Arrange the 12 hot dog halves evenly over the bottom buns. Spoon the chili generously over the hot dogs, spreading it to cover them completely. Sprinkle the shredded cheddar cheese evenly over the chili. Place the top slab of buns over the cheese.

Step 3: Bake to Perfection
In a small bowl, melt the butter. Stir in the garlic powder, onion powder, and Worcestershire sauce. Brush this seasoned butter mixture evenly over the tops of the rolls. Cover the baking dish with aluminum foil and bake for 15 minutes. Then, remove the foil and bake for another 5-10 minutes, or until the cheese is bubbly and the tops of the rolls are golden brown and slightly toasted.
Tips for the Best Chili Dog Sliders
- Use Thick Chili: To prevent the buns from getting soggy, use a thick chili. If your chili seems thin, let it simmer on the stove for a few minutes to thicken up before assembling.
- Toast the Buns: For extra protection against sogginess, you can lightly toast the bottom buns in the oven for 2-3 minutes before adding the toppings.
- Shred Your Own Cheese: For the best melt, I recommend shredding your own cheese from a block. Pre-shredded cheese is often coated in anti-caking agents that can affect how it melts.
- Don’t Skip the Butter Topping: The seasoned butter topping not only adds incredible flavor but also helps to create that perfect golden, slightly crispy top.
Variations and Substitutions
One of the best things about this recipe is how easy it is to customize. Try one of these fun variations!
- Different Cheeses: Swap the cheddar for Monterey Jack, a Mexican cheese blend, or even some spicy Pepper Jack for a little kick.
- Bun Alternatives: Any pack of slider buns will work if you can’t find Hawaiian rolls.
- Spice It Up: Add some diced jalapeños on top of the chili before adding the cheese for a spicy version.
- Add Onions: For a classic chili dog experience, sprinkle some finely diced white onion over the chili.
If you’re looking for another cheesy appetizer to serve alongside these, this delicious crockpot rotel dip is always a huge hit.

What to Serve with Your Sliders
These Chili Cheese Dog Sliders are a meal in themselves, but they also pair wonderfully with classic sides. Consider serving them with french fries, tater tots, a simple coleslaw, or a fresh green salad. They are a fantastic addition to any spread of Super Bowl food ideas.
Storing and Reheating Leftovers
If you have any leftovers, they are easy to store and reheat.
- To Store: Place the sliders in an airtight container and refrigerate for up to 3 days.
- To Reheat: For best results, reheat the sliders in the oven at 350°F (175°C) for about 10-15 minutes, or until warmed through. You can also microwave them, but the oven will keep the buns from getting too soft.
Frequently Asked Questions
Yes, you can assemble the sliders a few hours in advance. Prepare them up to the point of adding the butter topping, then cover and refrigerate. When you’re ready to bake, brush on the melted butter topping and add a few extra minutes to the initial covered baking time.
The best way to prevent soggy buns is to use a thick chili. Additionally, you can lightly toast the bottom half of the buns for a few minutes in the oven before adding any toppings. This creates a slight barrier.
For the best results and convenience, we recommend using a can of thick, no-bean chili. If your chili is on the thinner side, you can simmer it on the stovetop for a few minutes to thicken it up before assembling the sliders.
All-beef hot dogs are a classic choice and provide great flavor. However, you can use any type of hot dog you prefer, including turkey dogs or veggie dogs, for this recipe.
These sliders pair perfectly with classic sides like french fries, tater tots, onion rings, coleslaw, or a simple green salad. They are a great centerpiece for a party or game day spread.
More Crowd-Pleasing Recipes You’ll Love
If you loved how easy and delicious these sliders were, you should try some of our other fan-favorite recipes. This chili dog casserole offers a similar flavor profile in a hearty casserole form, while these bacon-wrapped jalapeno poppers are another must-have party appetizer.
Ready to Make Some Sliders?
These Chili Cheese Dog Sliders are a must-try for your next gathering. They’re savory, cheesy, and so easy to make! If you try this recipe, I’d love to hear about it. Leave a comment below or tag me when you share it to Pinterest!

Chili Cheese Dog Sliders Recipe
Chili Cheese Dog Sliders: The Ultimate Party Food
Ingredients
Equipment
Instructions
- Preheat your oven to 375°F (190°C). Slice the entire slab of Hawaiian rolls in half horizontally. Place the bottom half in a 9x13 inch baking dish.
- Cook the hot dogs using your preferred method (boil, grill, or pan-fry) until heated through. Slice each hot dog in half lengthwise to create 12 pieces.
- Arrange the 12 hot dog halves on the bottom buns. Spoon the chili over the hot dogs, followed by an even layer of shredded cheddar cheese. Place the top slab of buns on top.
- In a small bowl, combine the melted butter, Worcestershire sauce, garlic powder, and onion powder. Stir well.
- Brush the seasoned butter mixture over the tops of the rolls. Cover the baking dish with aluminum foil and bake for 15 minutes.
- Remove the foil and bake for an additional 5-10 minutes, or until the cheese is fully melted and the tops are golden brown. Let cool for a few minutes before serving.
Notes
Shredding your own cheese from a block will result in a better, gooier melt.
Serve immediately for the best texture.