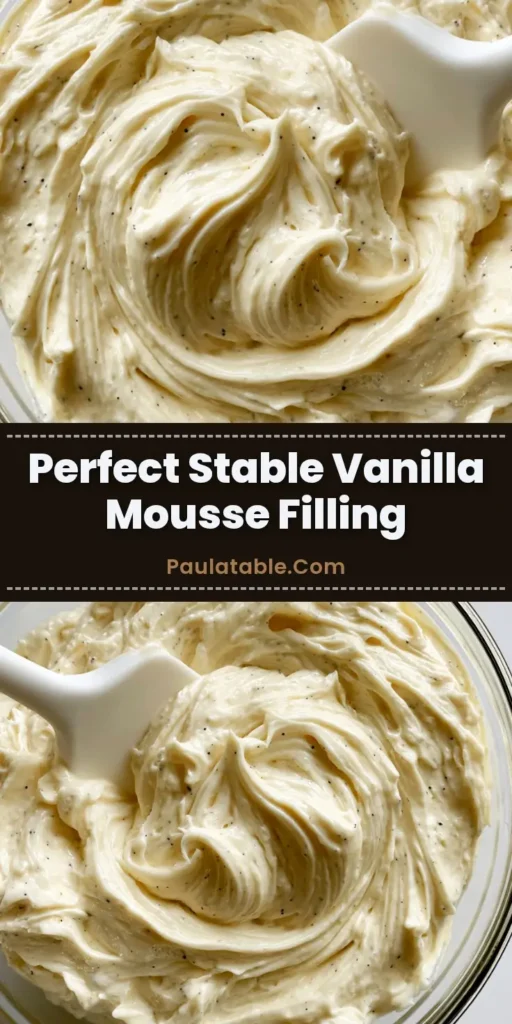
The perfect Vanilla Mousse Cake Filling is the holy grail of professional pastry arts, offering a structural integrity that withstands heavy cake layers while maintaining a cloud-like lightness. This specific recipe creates a pale ivory, dense, and aerated texture that looks as luxurious as it tastes.
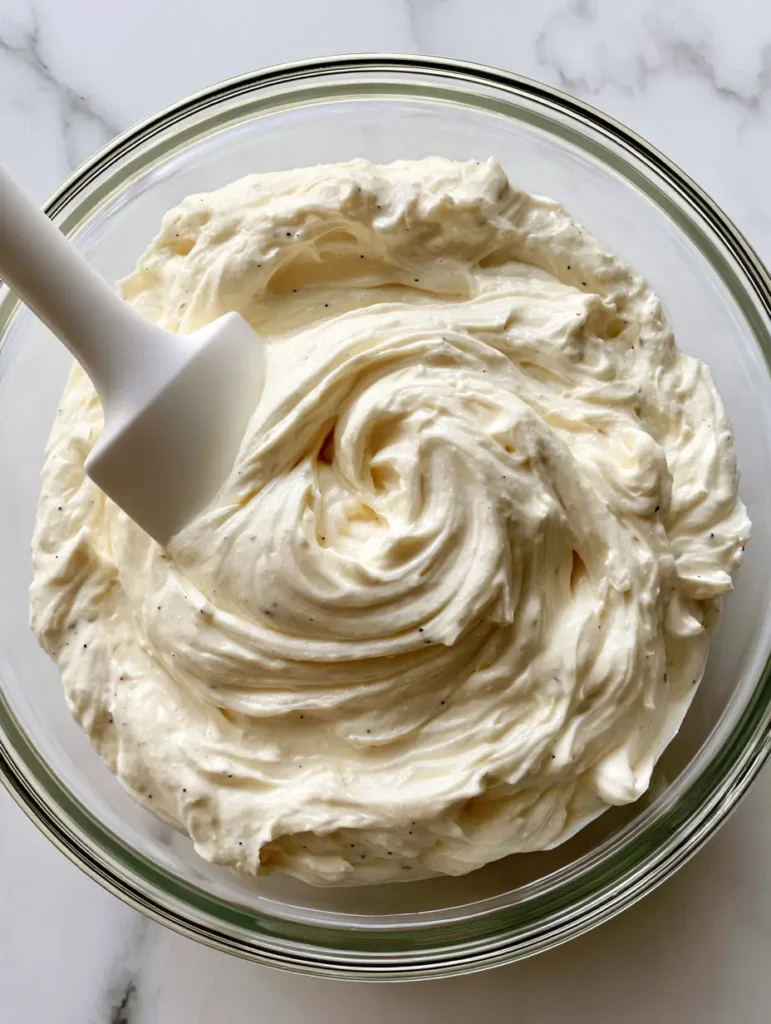
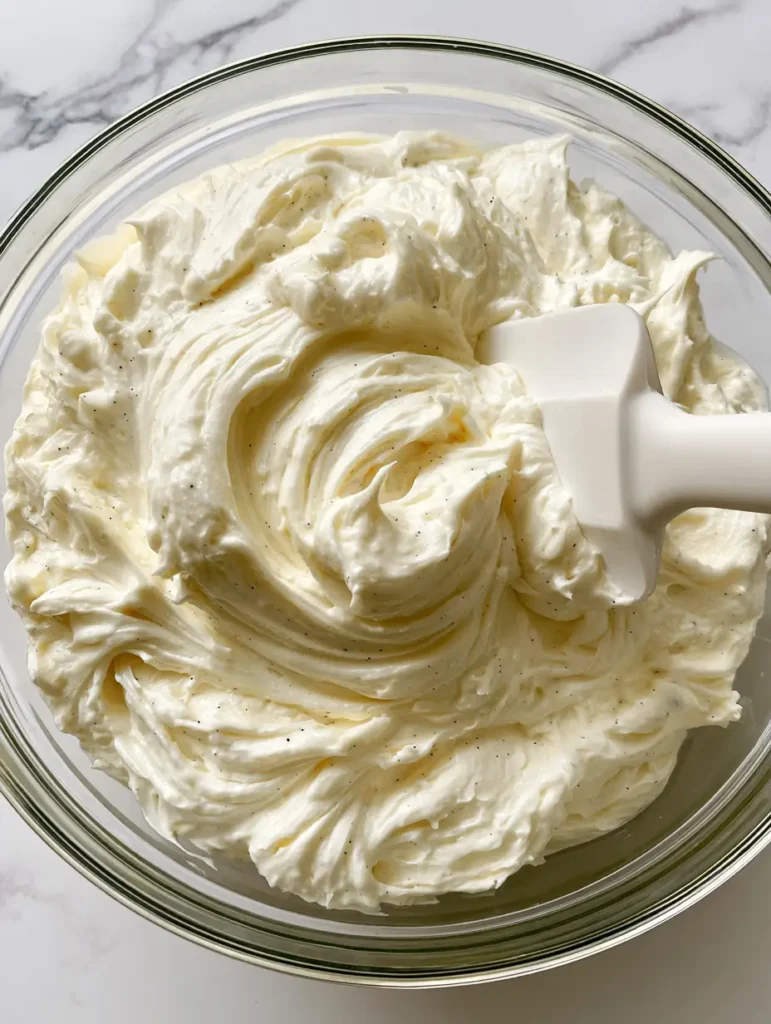
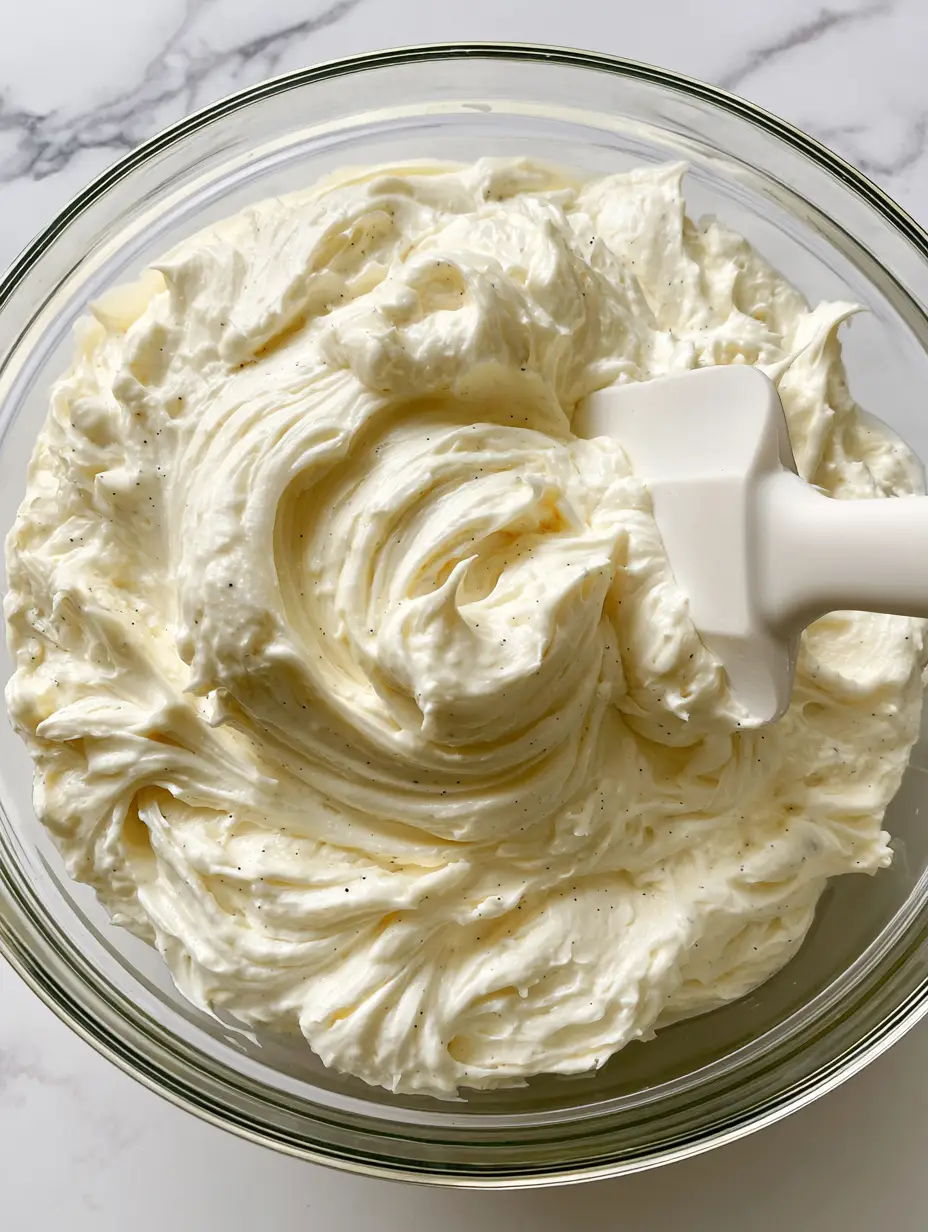
When you pull your white silicone spatula through this mixture in a clear glass mixing bowl, you will see deep, glossy, stiff peaks and soft ribbons that hold their shape perfectly. The visible tiny black vanilla bean specks throughout the ivory cream signal to your guests that they are about to enjoy a high-end, artisanal dessert.
Whether you are building a towering wedding cake or a simple weekend treat, this filling provides the velvety mouthfeel and visual elegance required for world-class results. It is specifically engineered to be stable enough for stacking while remaining soft enough to melt on the tongue.
Why This Professional Vanilla Filling Changes Everything
- Structural Stability: Unlike standard whipped cream, this mousse is stabilized to support the weight of multiple cake layers without bulging.
- Visual Sophistication: Tiny vanilla bean specks provide a “from-scratch” gourmet aesthetic that mimics high-end patisserie results.
- Glossy Finish: The emulsion technique ensures a glossy, reflective surface that remains beautiful even when the cake is sliced.
- Versatile Flavor: The pale ivory base acts as a perfect canvas for various pairings, from fresh berries to decadent chocolate sponges.
Foundational Elements for a Stable Ivory Mousse
Heavy Whipping Cream (480ml / 2 cups): This is the backbone of your aeration; ensure it has at least 36% milk fat to achieve those characteristic stiff peaks. The cold fat globules trap air during agitation, creating the dense yet fluffy volume seen in the clear glass bowl.
Powdered Sugar (60g / 1/2 cup): Also known as confectioners’ sugar, this provides sweetness and contains a small amount of cornstarch which aids in the initial stabilization of the cream. It dissolves instantly, ensuring the mousse remains perfectly smooth without any grainy texture.
Vanilla Bean Paste (15ml / 1 tbsp): This is crucial for the “forensic accuracy” of the dish, providing those distinct black specks and a deep, floral aroma. While extract works, the paste offers the visual luxury of real vanilla bean pods without the labor of scraping them.
Unflavored Gelatin (10g / 2 tsp): The “invisible” structural engineer of this recipe that allows the mousse to function as a cake filling. It creates a thermo-reversible bond that sets the cream into a velvety, sliceable consistency once chilled.
Whole Milk (30ml / 2 tbsp): Used specifically to “bloom” the gelatin, ensuring it hydrates properly before being incorporated into the mixture. This step prevents lumps and ensures the final texture is uniform and aerated.
Essential Kitchen Tools for Perfect Aeration
To achieve the visual result of glossy cream peaks, a clear glass mixing bowl is highly recommended so you can monitor the aeration at all levels. A white silicone spatula is the professional choice for folding, as its flexibility allows you to scrape the bottom of the bowl without deflating the delicate air bubbles.
You will also need a stand mixer or electric hand mixer equipped with a whisk attachment. The high-speed rotation is what creates the “soft ribbons” and eventually the stiff, glossy peaks described in our visual blueprint. Finally, have a small microwave-safe ramekin ready for the gelatin blooming process.
Master the Art of Stable Mousse: Step-by-Step
1. Blooming the Structural Foundation
In a small bowl, sprinkle the 2 tsp (10g) of unflavored gelatin over 2 tbsp (30ml) of cold milk. Let it sit for 5 minutes until it looks like a thick, translucent sponge; this process ensures every granule is hydrated. If you skip this, your Vanilla Mousse Cake Filling will have a gritty texture instead of a velvety one.
2. Preparing the Vanilla Infusion
Measure your cold heavy whipping cream into your clear glass mixing bowl. Add the 1 tbsp (15ml) of vanilla bean paste and the 1/2 cup (60g) of powdered sugar. Use your white silicone spatula to give it a gentle stir, ensuring the vanilla bean specks are distributed before you begin the high-speed whipping.
3. Achieving the Initial Aeration
Using your mixer on medium-high speed, whisk the cream mixture until it begins to thicken. Watch for the moment the whisk begins to leave visible trails in the cream, often referred to as “soft ribbons.” At this stage, the mixture should still be somewhat fluid but significantly increased in volume.
4. Incorporating the Stabilizer
Gently melt the bloomed gelatin in the microwave for 10-15 seconds until it is liquid but not boiling. While whisking the cream on low speed, slowly drizzle the liquid gelatin into the bowl. This “tempering” technique prevents the gelatin from seizing into clumps when it hits the cold cream.
5. The Final Glossy Fold
Turn the mixer to high and whisk until the cream forms deep, glossy, stiff peaks. Stop immediately when the peaks stand straight up when the whisk is lifted. Use your white silicone spatula to do one final “fold” from the bottom of the glass bowl to ensure the vanilla bean specks are perfectly marbled throughout the pale ivory mousse.
Pro Secrets for Flawless Cake Construction
When using this mousse as a filling, always pipe a “dam” of sturdy Russian buttercream around the edge of your cake layer first. This prevents the mousse from being squeezed out by the weight of the sponge above it. Once the dam is in place, fill the center generously with your vanilla mousse.
For a multi-layered effect, you can alternate this recipe with a decadent chocolate mousse cake filling for a classic “Tuxedo” cake appearance. The contrast between the dark chocolate and the ivory vanilla specks is visually stunning when the cake is sliced open.
If you find your mousse is setting too quickly in the bowl, simply use your white silicone spatula to give it a vigorous stir. The friction will soften the gelatin slightly, making it spreadable again. However, for the best visual results, try to fill your cake immediately after the stiff peaks have formed.
Preservation and Make-Ahead Strategies
This Vanilla Mousse Cake Filling can be made up to 24 hours in advance if stored correctly. Keep it in an airtight container in the refrigerator to prevent it from absorbing any “fridge smells” which can taint the delicate vanilla profile. Before using, you may need to whisk it for 30 seconds to restore the glossy peaks.
While the mousse itself does not freeze well in its liquid state, a fully assembled cake filled with this mousse freezes beautifully. The sugar and fat content protect the aerated structure from ice crystals. To thaw, move the cake to the refrigerator 24 hours before serving to ensure the mousse returns to its velvety, dense texture.
What to Pair with This Luxurious Vanilla Center
This filling is incredibly versatile and pairs well with almost any cake base. It is particularly effective inside a Dubai chocolate pistachio cake where the light vanilla balances the rich nuttiness. The pale ivory color also provides a beautiful contrast against dark cocoa sponges.
For a lighter dessert, try dolloping the fresh mousse onto delicate French almond cookies or using it as a dip for oreo cheesecake cookie cups. The velvety density makes it feel like a premium accompaniment rather than just a simple whipped topping.
Common Mousse Questions Answered
You can substitute the heavy cream with chilled coconut cream (fat only) and use agar-agar instead of gelatin, though the setting temperature and texture will vary slightly.
You can, but you will lose the signature black specks and the deep ivory visual appeal. Use 1 tablespoon of extract as a 1:1 substitute.
For the best results, allow the filled cake to chill in the refrigerator for at least 4 hours. This gives the gelatin time to fully set the velvety structure.
Yes, this recipe uses a gelatin stabilizer specifically to provide the structural integrity needed for stacked cakes. Always pipe a buttercream dam to ensure total security.
Graininess usually occurs if the melted gelatin is too cold when added to the cream, causing it to seize. Ensure the gelatin is liquid and drizzled slowly while mixing.
The Professional Vanilla Mousse Recipe Card
Vanilla Mousse Cake Filling: The Ultimate Velvety Professional Recipe
Ingredients
Equipment
Instructions
- Sprinkle the gelatin over the cold milk in a small ramekin. Let sit for 5 minutes until hydrated and spongy.
- Microwave the bloomed gelatin for 10-15 seconds until completely liquid and clear. Do not let it boil.
- In a clear glass mixing bowl, combine the cold heavy cream, powdered sugar, and vanilla bean paste. Stir gently with a white silicone spatula.
- Use a mixer on medium-high speed to whisk the cream until it begins to thicken and leaves soft ribbons when the whisk is lifted.
- Lower the mixer speed and slowly drizzle in the melted gelatin. Increase speed to high and whisk until the mixture forms deep, glossy, stiff peaks.
- Using the white silicone spatula, fold the mixture one last time to ensure the vanilla bean specks are evenly distributed throughout the ivory mousse.
Notes
Always pipe a buttercream dam when using this as a filling between heavy cake layers.
Transform Your Next Dessert Today
Creating a bakery-quality Vanilla Mousse Cake Filling is all about the balance of science and sensory awareness. By following these steps, you’ve mastered the art of the stabilized emulsion, resulting in a filling that is as structurally sound as it is delicious. Your cakes will now have the height, stability, and professional finish that only a true mousse can provide.
We would love to see how your glossy peaks turned out! Leave a comment below with your favorite cake pairing, or sign up for our newsletter for more professional pastry tips. Don’t forget to share your ivory vanilla creations on Pinterest to inspire other home bakers!